Frames provide an effective way to organize web
documents, visually and also logically, by dividing into different parts. They allow
a web page to be divided into several independent sections so a page using
frames is actually made up of several .html files. There must be one .html file for each frame with one additional file that contains the frameset
information. One common example of frame use is to have a page split into two
sections – one for the page content and one for the navigation. Because both
are in different frames, any scrolling within the main content frame will not
affect the position of the navigation frame.
Another
very important aspect of frames is that, we can divide our window into various
segments according to our different purposes. For example, you might want to
have a website that is selling chocolate and you may want to have a panel for special
offers or bulk-buy discounts which is always visible to your customers. In this
case we do not want to disturb our main content of the web page, here a framed
webpage will give more flexibility to our website, because all frames are
independent to each other and able to work autonomously.
Another
reason might be to have all your site's links visible on the page, while the
actual 'content' - i.e. text, or shop items or blog scrolls as much as it
needs.
To create a framed or segmented web page we have to
use the <FRAMESET> tag to specify the layout of the frames on the page.
The document containing the frameset isn’t visible because it simply specifies
how the other documents will be arranged on the page. It is placed in your HTML
document where your <BODY> section would normally appear, so this
document will not be having <BODY> tag and contains the following
attributes.
|
COLS=
|
Means
Columns, so if you want to divide your webpage in vertical sections than we
use this attribute. It specifies how many frames the window will be split
into vertically and specifies the width of each frame. The width can be
indicated in pixels or % of the available space. Numbers separated by commas
specify the width of each frame. The default width is 100% = one column
taking up the whole width. So Suppose you want to create a web page with 3
vertical sections then
<frameset
cols=”30%,30%,*”> - using % of the
screen
<frameset
cols=”300,300,400”> using number of pixels
|
|
ROWS=
|
Means
Rows, so if you want to divide your webpage in the horizontal sections the we
can use this attribute. It specifies how many frames the window will be split
into horizontally and specifies the height of each frame. The height can be
indicated in pixels or % of the available space. Numbers separated by commas
specify the height of each frame. The default is 100% = one row taking up the
whole height. For Example:
<frameset
rows=”30%,30%,*”> - using % of the
screen
<frameset
rows=”300,300,400”> using number of pixels
|
|
FRAMESPACING=
and BORDER=
|
Many
browsers will place a bit of blank space between frames. Using these two
attributes and setting them both to 0 can prevent this. Internet Explorer
uses FRAMESPACING while Navigator and other browsers such as Opera use
BORDER.
|
A FRAMESET may
be split into both rows and columns to create a grid.
This must be the first tag and body tag
should not present in this document.
<FRAMESET ROWS=”40%,
60%” COLS=”200,*”> Content of frameset here
</FRAMESET>
This would create a frameset with two rows and two
columns. The first row would take up 40% of the height and the second row would
take up 60% of the height. The first column would be 200 pixels wide and would
leave the remaining width for the second column.
The FRAME Tag
When we had specified the number of frames in the
document now we have to add different frames in the spaces provided for the
different sections. The <FRAME> tags are inserted between the start and
end <FRAMESET> tags. The <FRAME> tag can contain the following
attributes:
|
FRAMEBORDER=
|
If
FRAMEBORDER=1, then the frame will have borders between itself and each
adjacent frame. If FRAMEBORDER=0, the frame will have no borders around it. 1
is the default value. In most recent browsers, this attribute may also be
placed in the FRAMESET tag to create a default for each frame.
|
|
MARGINHEIGHT=
|
Specifies
the amount of space (in pixels) above and below the frame.
|
|
MARGINWIDTH=
|
Specifies the amount of space (in
pixels) on either side of the frame.
|
|
NAME=
|
Name of the frame. Names must begin
with an alphabetical character (A to Z).
|
|
NORESIZE
|
When this attribute is used, the frame
cannot be re-sized with the mouse
|
|
SCROLLING=
|
Determines whether or not a scroll bar
will appear in the frame. The choices are yes, no and auto. Auto means that a
scroll bar will appear if the frame contents are big enough to need one
(won’t fit in the frame without scrolling). Auto is the default.
|
|
SRC=
|
Reference
to the document that will initially be displayed in that frame
|
FRAME tag Syntax
<FRAME
SRC=”main_document.html” SCROLLING=”no” FRAMEBORDER=0>
This frame would have no scroll bar, no border and
would initially display the document named ‘main_document.html’
<FRAME
SRC=”other_document.html” NAME=”document”>
This frame would
show the document ‘other_document.html’ and would have the name named
‘document’.
For example
<FRAMESET COLS=”100,400,200”>
<FRAME SRC=”First.html” NAME=”left”>
<FRAME SRC=”Second.html” SCROLLING=”yes”
NAME=”middle”>
<FRAME SRC=”third.html” SCROLLING=”no”
NAME=”right”>
</FRAMESET>
In this example, the webpage would be split into three vertical sections. The left
section will be of 100 pixels, middle section will be 400 pixels and last
section will be of 200 pixels wide.
Frameset.html
<FRAMESET COLS="100,400,200">
<FRAME SRC="first.html"
NAME="left">
<FRAME SRC="second.html"
SCROLLING="yes" NAME="middle">
<FRAME SRC="third.html"
SCROLLING="no" NAME="right">
</FRAMESET>
First.html
<body bgcolor="pink">
<center>
<h1> This is first.html</h1>
</center>
</body>
Second.html
<body bgcolor="lemon yellow">
<center>
<h1> This is second.html</h1>
</center>
</body>
Third.html
<body bgcolor="sky blue">
<center>
<h1> This is third.html</h1>
</center>
</body>

Examples
of FRMAES:-
<frameset rows="16%,84%">
<frame src="First.html" name="top">
<frame src="second.html" name="bottom">
</frameset>
<frame src="First.html" name="top">
<frame src="second.html" name="bottom">
</frameset>

Nested
Frameset:-
A frame inside another
frame is called nested frames. Take a look at the HTML in the following
example.
<FRAMESET ROWS="10%,
90%"> first frame
<FRAMESET COLS="20%,
80%"> second frame
</FRAMESET>
</FRAMESET>
This frameset would
result in a frame along the top with the bottom frame being further divided
into two vertical frames as shown below. Note how the two frames of the second
frameset are contained in the lower frame of the first frameset.
In this example, I had
divided page row-wise and than first frame is further subdivided into 2 frame
column-wise.
<frameset
rows="16%,84%">
<frameset cols="50%,50%">
<frame src="first.html” name="tl">
<frame src="second.html" name="tr">
<frame src="second.html" name="tr">
</frameset>
<frame src="third.html" name="bottom">
<frame src="third.html" name="bottom">
</frameset>

In the following example,
there is a division of lower frame in 2 sections.
<frameset
rows="16%,84%">
<frame
src="first.html" name="top">
<frameset
cols="50%,50%">
<frame
src="second.html" name="left">
<frame
src="third.html" name="right">
</frameset>
</frameset>

In the following example there is a grid of frames 2X2, in
which we can open 4 different pages
<frameset
rows="50%,50%" cols="50%,50%">
<frame src="topleft.htm" name="topleft">
<frame src="topright.htm" name="topright">
<frame src="botleft.htm" name="botleft">
<frame src="botright.htm" name="botright">
<frame src="topleft.htm" name="topleft">
<frame src="topright.htm" name="topright">
<frame src="botleft.htm" name="botleft">
<frame src="botright.htm" name="botright">
</frameset>
Fourth.html
<body
bgcolor="green">
<center><h1> This is
fourth.html</h1>
</center>
</body>

Another
example of nested Frame
<frameset rows="50%,50%"
cols="50%,50%">
<frame src="topleft.htm" name="topleft">
<frame src="topright.htm" name="topright">
<frame src="botleft.htm" name="botleft">
<frameset rows="50%,50%">
<frameset cols="50%,50%">
<frame src="brtl.htm" name="brtl">
<frame src="brtr.htm" name="brtr">
</frameset>
<frame src="botrbot.htm" name="botrbot">
</frameset>
</frameset>

Non-Frames Browsers
Main drawback for using
frames is that many users of your site may be using a browser that doesn’t
support frames. HTML makes allowances for this by providing alternate HTML for
these browsers by using the <NOFRAMES> tag. The <NOFRAMES> section
is normally placed before your closing <FRAMESET> tag.
The HTML highlighted in bold for
browsers that won’t recognize the frames. So before closing the outermost </frameset>
provide the <noframe> tag also.
<HTML>
<HEAD>
<TITLE>Frames document</TITLE>
</HEAD>
<FRAMESET ROWS="20%,
80%">
<FRAME SRC="blank.html">
<FRAMESET COLS="20%,
80%">
<FRAME
SRC="blank.html">
<FRAME SRC="blank.html">
</FRAMESET>
<NOFRAMES>
Anything in this
section would appear in browsers that don’t recognize frames
</NOFRAMES>
</FRAMESET>
</HTML>
Hyperlinks
in Frames :- if you are using a frames document and you want to use an
hyperlinks tag then there should be and additional attribute – the TARGET
attribute which specifies the location or name of the frame where you want to
open this document so the frames are as containers for the another webpages.
The TARGET attribute equals the name of the frame where the document the
hyperlink refers to should load. If no target is specified, the destination
document will load in the same frame the hyperlink was in.
For E.g. suppose we have
a page divided into two vertical frames, first frame is named as left and
second is named as right and I want to open my first.html in the right frame then
I have to give the following tag with target attribute.
<A
HREF=”first.html” TARGET=”right”>current news</A>
Hyperlinks.html
<Frameset
cols="200,*">
<frame
src=new.html name="left">
<frame
src=Second.html name="right">
</frameset>
In
this code, I had created 2 frames column-wise in which first column is having a
hyperlinked text like first frame and I want when I click on it, it should open
in the right frame. By default it will open this page in the same frame but if I
will sent its target to the right frame it will open in right frame.

<html><head></head>
<body>
<a href="first.html"> first frame</a>
</body>

<html><head></head>
<body>
<a href="first.html"
target="right"> first frame</a>
</body>

There are some more key
values for the hyperlink tag to open the document as a target like as follows.
They are listed below.
|
_blank
|
It
will open destination document in a
new, unnamed browser window. The destination document will also load in a new
window if the target name is not the same as an existing frame name.
|
|
_parent
|
It is applicable
in nested framesets, this will load the destination document in the parent
frame.
|
|
_self
|
This
will load the destination document in the same frame that the link is in.
This is the default if no target is specified.
|
|
_top
|
This will cause the destination
document to fill the entire browser window.
|
Tips
for Frame Links
Some people really don’t like frames. The most
common reason why is because there are so many sites that use frames poorly,
particularly in the way links are handled, so here are a few tips to help you
make frames improve your site rather than annoy every one who visits.
1. If
you are linking to another site, make sure you use _top as the frame target.
Trying to browse a website when it’s in the frame of someone else’s site can be
a real pain. Some web developers purposely leave this out to make sure their logos
and navbars remain when visitors go to other sites. This is generally frowned
upon by other web developers.
2.
If
you are using one frame for navigation, make all of its links target a common
frame, so the user knows where the new document will appear.
3. When
creating your frameset, give the frames meaningful names that you will
remember. It will make life easier when you are creating links in each of the
documents.
Inline Frames
As the frames split a page into different sections, but
an inline frame makes it possible to place a frame somewhere in the page, just
as you would place a picture. Inline frames are placed on a page using the
<IFRAME> tag, which has a closing </IFRAME> tag. This tag has the
attributes listed below.
|
NAME=
|
It
is used to identify the frame. Similar
to the NAME attribute in a FRAME tag.
|
|
HEIGHT=
|
To
change the height of the frame. Usually specified in pixels though it can be
specified as a % of the page height.
|
|
WIDTH=
|
To
change width of the frame. Usually specified in pixels though it can be
specified as a % of the page width.
|
|
SCROLLING=
|
Same
as the SCROLLING attribute of the FRAME tag
|
|
FRAMEBORDER=
|
Same
as the FRAMEBORDER attribute of the FRAME tag
|
|
ALIGN=
|
Same
as the ALIGN attribute of the IMG tag
|
Inline frames cannot be re-sized so there is no need
for a NORESIZE attribute. Some browsers also supports a VSPACE and HSPACE
attribute for inline frames.
Creating an
Inline Frame : for example
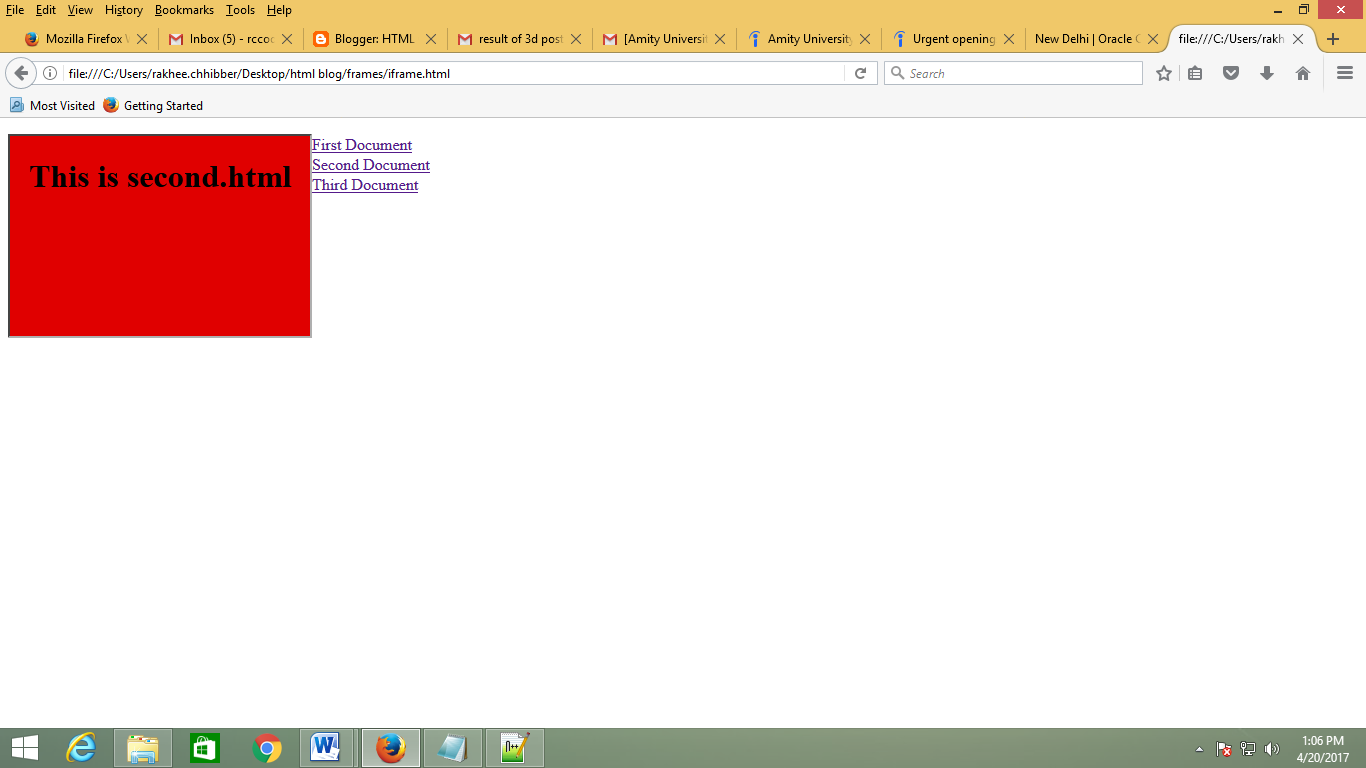
Iframe.html
IFRAME
NAME="myframe" SRC="first.html" WIDTH="300"
HEIGHT="200" ALIGN="left">
<!--Content
for non-inline frame browsers-->
This is what
non-IFRAME browsers will see. </IFRAME>
<!--Links
next to iframe-->
<P><A
HREF="first.html" TARGET="myframe">First
Document</A> <BR>
<A
HREF="second.html" TARGET="myframe">Second
Document</A> <BR>
<A
HREF="third.html" TARGET="myframe">Third
Document</A>

·
Now when we click on any link of the above code, it
will open in the iframe container. Let I click on second document button it
will show the following figure as:-
·
If you add a FRAMEBORDER="0"
attribute to your IFRAME tag then the frame in the document will show without a
border.

No comments:
Post a Comment